Showing posts with label do-overs. Show all posts

Tuesday, May 10, 2011

i can't find the off switch.

For my tired old brain that is.


Craig and I have been in quite a bit of turmoil about the recent job offer he's been given.

We haven't stopped talking about the possiblity of this job for about 9 months.
This job opportunity has been something that we have been hoping for and praying for.
We have been wanting to get back to Utah since we moved to Arizona 5 years ago.
Now that the choice was ours to make......
......we felt it was finanlly going to happen.


At least that's what we thought.

We wanted this.
We prayed for this.
Seriously, I felt like I might die if I couldn't get back to Utah.
I missed our kids.


And for reasons beyond our control, the new job  just.wouldn't.fit.
And, suddenly, Craig's present job seemed to fit perfectly.

Now, although I will continue to miss our families, especially our grown children,
I feel a peace that I know, comes from my Heavenly Father.
I feel he is letting me know that he is aware of our feelings.

He knows me.
He knows my family.

And more importantly,
He knows what we need.

All of us.....

What you need.
What I need.
 What everyone needs.


For that perfect knowledge, I am exceptionally thankful.


So, we begin our journey anew here is sunny (and decidedly hotter than I prefer)
Tucson, Arizona.


With all of this decision making, I haven't felt much like creating.
There isn't anything that sucks the creativity out of me more than a stressful situation.
It seems like I've had my hands in several different projects but haven't completed hardly any of them.

Sooooooo, I decided I would show some of the things I am almost done with! :)


Here are two quilt tops waiting for me to finished up.
I sure hope they don't have to wait too long!

 I joined a pinkeep swap over at Ravenwood Whimsies.
My swap partner is Patti from Raspberry Lane Primitives. This is a little sneak peek for her.
I am sending this off to you tomorrow Patti.
I hope you like it! :):):)
 And here is a finish that I just got done today.
This is my "sewing chair" It is also the "hair cut chair" and the "extra guest at dinner" chair.
A long time ago, I started painting it red, but I didn't like it so I cleaned it all off.
 But, it seemed that it was meant to be red, because this is how the old gal looks now.
I believe she's much too pretty to have her "after" picture taken in the garage,
 but, due to her smelly stain smell, that's where she'll stay for a little while longer. 

I have big plans for all of these chairs I have been making over.
Now that I know we are staying put, I have to get busy filling up these empty bedrooms.

I'm thinking a guest room........and a sewing room........and a master bedroom re-do..........and a whole house paint job........and a......................

Wednesday, April 13, 2011

Ugh. Cuss word! (Chair make over #2)

This was one of THOSE projects.
The kind that makes a person procrastinate projects of this sort in the future.
I had an idea in my head about how I thought this chair would look when I was done with it.

It's a little wire chair that I got from a friend many, many years ago.
Makenzie has had it in her room and it's been fun keeping it the way it was.
 Every time she changed the look of her room, we would buy a new toilet seat cover to put on the seat. They always fit perfectly and there are so many choices! :)


Well.....I had an old round pillow that I cut open so I could use the stuffing on the seat. I carefully covered it with batting and stapled the batting down.

 Then I added the fabric and stapled it down.
And, if you're wondering,
YES, my hand was really cramping trying to use that big clunky staple gun.

I trimmed it up really nice and neat underneath.

 Do you see my markings on the bottom? I was being so careful to make sure that the seat fit perfectly back on the chair once it was  completed.

I wanted to make it have a tufted look so I decided to add a covered button to the middle of the seat. I attached it using wire. I brought the wire up through a hole in the bottom of the seat, looped the button on and put it back down through the hole.
 I pulled it tight with pliers and stapled the wire down in place.
 While I was covering the seat, the chair,
that I had spray painted a glossy black, was drying out in the garage.
I was so excited to bring it in and attach the seat!
 And that was when I cussed.

 It wasn't a "bad" swear, it was just a little one.

I cussed because I noticed that the stripes weren't centered on the seat.

And, the button wasn't centered either.

Not to mention that it made the seat look like it had a giant belly button.

Ugh!!!

So, I gave myself a 24 hour cooling off period.......
and started over.


Here is the big reveal!

Centered striped and no belly button.
***sigh***
I feel much better.
No more cussing for me.

At least for now. ;}

Tuesday, April 12, 2011

Speaking of feedsacks......


I have another feed sack project to share!
I've been dragging around some vintage 9-patch blocks forever. I found them on ebay for about $7!


They are all hand stitched.


I decided to use the disappearing 9-patch pattern and make them into a little lap quilt.
Mary @ Gettysburg Homestead just finished up a great tutorial with this pattern. http://gettysburghomestead.blogspot.com/

First, you cut your 9-patch in half down the middle squares, then turn your block and cut it in half again down the middle square. (Sorry-I should have taken a picture of this step)

 The thing I like about this pattern is there are several ways to arrange your blocks after they're cut....

You can sew them back together like this-

 Or like this-
(I chose this way)
 Or like this-
 Then you sew them all together!
I quilted in the ditch for this one. It went fast and easy. Two of my favorite things!
This is my favorite block in this quilt. :)
 I put a small checked gingham sashing on it and bound it with a small rosebud print. I like how the black anchored it but it has all f the bright colors found in the blocks.
 I think I am really warming up to all of these fun colors.

Have a great day!

Saturday, April 9, 2011

a vintage finish.

About 5 years ago, I bought a vintage quilt top on eBay. It was an incomplete top so it was very inexpensive. When I got it, I didn't quite know what to do with it, but what I did know was that I loved the colors. I was made from old feed sacks, which delighted me all the more.

I could see where the seams of the sacks had been picked apart
and there were stamps like this on a few of the blocks.
I loved the "make do" quality of it.....
See here where two of the light blue hexies are the same color but not the same pattern?
 I like to think of the thrifty hands that pieced this together using the last bits of fabric they had. :)

Since I couldn't make any sort of a quilt out of the top I decided to take it apart and make a few things with it. First, I unpicked enough blocks to make a portion of the quilt into a table runner.

Then, I took two of the unpicked blocks and framed them. I found these frames at goodwill and spray painted them black. Then I used spray adhesive to attach them to the fabric backing.

I took the largest piece for the runner and machine quilted it.
I used a stippling stitch with a red variegated thread.
When that was finished, I couldn't decide how I would bind the edges.
I finally decided to measure and cut straight edges, because some of the border hexies were so uneven.
 Then I bound it with a black pin dot fabric.
It was a ginormous pain in the neck to sew all those corners,
and it took a whole lot longer than I want to talk about,
BUT, I'm so glad it's finished!
 I like how it is just the right size for our big table.
And I loooove the red!
 I hope that whoever pieced this all those years ago, likes how it ended up. 
 I am certainly grateful for all the work that went into it before it came into my life!

Friday, April 1, 2011

some more make overs


Well, it's April 1st, and I hope everyone is playing nice April fools jokes on people.
The mean ones are just not as fun!
My Craig sure was the victim of a mean one this morning.....

One of his athletes came up to him this morning with big tears in her eyes,
asking him to help her tell her parents that she was pregnant.

As he went to give her a consoling hug, telling her that he would do what he could to help her,
she started laughing and said, April Fools!

Needless to say, he didn't think it was funny.

I have always told my kids that playing a joke on someone is only funny if everyone has fun.


Anyway.......I have a couple of new make overs to share.

This bowl was a thrift store find that I got a while ago. I really liked it's size and shape.


 It was only $1.99 and I knew I could sand the edges to get rid of the few blemishes it had.

 After I spray painted it black, I did just that. With a nice coat of stain, it turned out real purdy!
 I put some paper grass in it and it made a nice little nesting place for my new grunged eggs.
Linda is such a sweet blog friend and has the funnest blog.
These eggs are so easy and fun to make and they smell delish!
If you've ever grunged up some candles, then these will be a piece of cake for you.

I keep my wax in an old coffee can and heat it double boiler style.

I put a pan of water on to boil, and set the can inside of the pan.

I use plain old wax that you can buy at the grocery store and colored it with black and brown crayons. I have also put bits of old candles in it (I melt what's left in the jar in the oven (checking often) on about 150* until they're liquid, then pour it in the coffee can) and they help with the yummy smell.

As for the smell, I have added all kinds of spices....cinnamon, nutmeg, cloves, allspice, etc.

After all of it is melted, I take the wax off the heat, and start dipping.

I stir the wax  often (with an old wooden spoon) to ensure the spices haven't all sunk to the bottom.
I use rubber gloves and just dip the eggs with my hands
and then set it on wax paper until they have cooled.

 I also rolled them in more spices that I have in a bowl.

It took about 4 dips and rolls before I got the consistency I liked.
As the wax cools, it sticks a little better.
I used my hands to help mold the wax around the egg.
 After I'm done, I peel the drips off of the wax paper and put them back into the wax along with any left over spices. SO fun! :)


The next little make over is for Ragan's bathroom.
I have been looking for a little clock to put in there for a long time,
but couldn't find the right one for just the right price.
BUT----she NEEDS one in there, on account of her chronic lateness.

I remembered this clock that my mom gave me about 100 years ago that I had out in the garage.

I figured I'd see what I could do with it.
I took it all apart......glued some round beads to the bottom for legs and painted it.


And here it is.
I painted it a hot pink first. Then I painted black over the pink. Her bathroom has bit of a shabby chic look to it, so I didn't want to prim it up too much. I spray painted the gold rim around the clock silver. After everything was dry, I lightly sanded the edges to show a tiny bit of pink, then sealed it with a spray sealer.


I think it turned out perfectly for Ragan's bathroom counter.

I have a feeling she will still be late though.


She never has really embraced my 5 minute beauty regimen.

Saturday, March 19, 2011

A new look

I made this table runner many years ago, but I never really liked it enough to put it out. It had a horrible binding that I had it zig-zagged on.....
Ya. It was terrible.

Well, in all my sorting, I came across it. I decided to give it a new look.

I unpicked the hideous binding and added some sashing fabric.

Then I hand stitched around the blocks and added a much more acceptable  binding.

I really like all the little bugs that are on it.....

 Everything is blanket stitched....When I made it,  I used some pretty heavy duty fusible web to attach all the pieces. My fingers definitely paid the price for that! :)

Giving this runner a new look kind of inspires me to get a new look for myself......

But, if I cut my hair, then I would actually have to style it, and we all know how I feel about make-up, right? More importantly, if I changed my wardrobe, then what would I do with all of my stretchy pants? And certain shirts would probably require me to wear a bra and that's pushing it for me....


Phew.
That was close.

Now. Let's just hope those people from "What not to Wear" never find me.

Saturday, March 5, 2011

A first try

After making the wool eggs that I showed you in my last post, I decided that I would make a penny mat.
I have worked with wool in the past and have found it very fun and easy,
but never have made a penny mat.

 I have only admired everyone else's!

I actually bought a little kit for this one so I would have a pattern and the instructions for future reference.

And here it is.....
(I put in on this big wooden charger so it could be seen on my black table)

To be honest, I struggled just a little bit.
It's not that it was difficult.

I think it's because I tried too hard.

Or maybe it's because I don't follow instructions well, or possibly,
 because I feel compelled to do my own thing.....

I don't know, but there is probably some medication that helps people with problems such as this.

The instructions had me trace the pattern onto freezer paper (brilliant!). The circle pattern had a large circle with a smaller circle inside it.

The smaller circle was to be cut out from the larger circle......so I had 16 "donuts" and 16 "donut holes".

Make sense??

Then, they were arranged as seen above.  The problem I found was that the little circles weren't necessarily the same size as the holes. The wool did stretch as I blanket stitched it into place but they smaller circles appear to be "sunk into" the larger ones.

Is this the way it's supposed to be?
I always assumed that the smaller circles were on top of the large circles.
Mine seems to lack the dimensional look that I have seen before.

Anyway, it is what it is.
I still like it.
And, I will more than likely try making another one.

That is, after all of you professional penny mat makers, impart your wisdom and knowledge unto me.

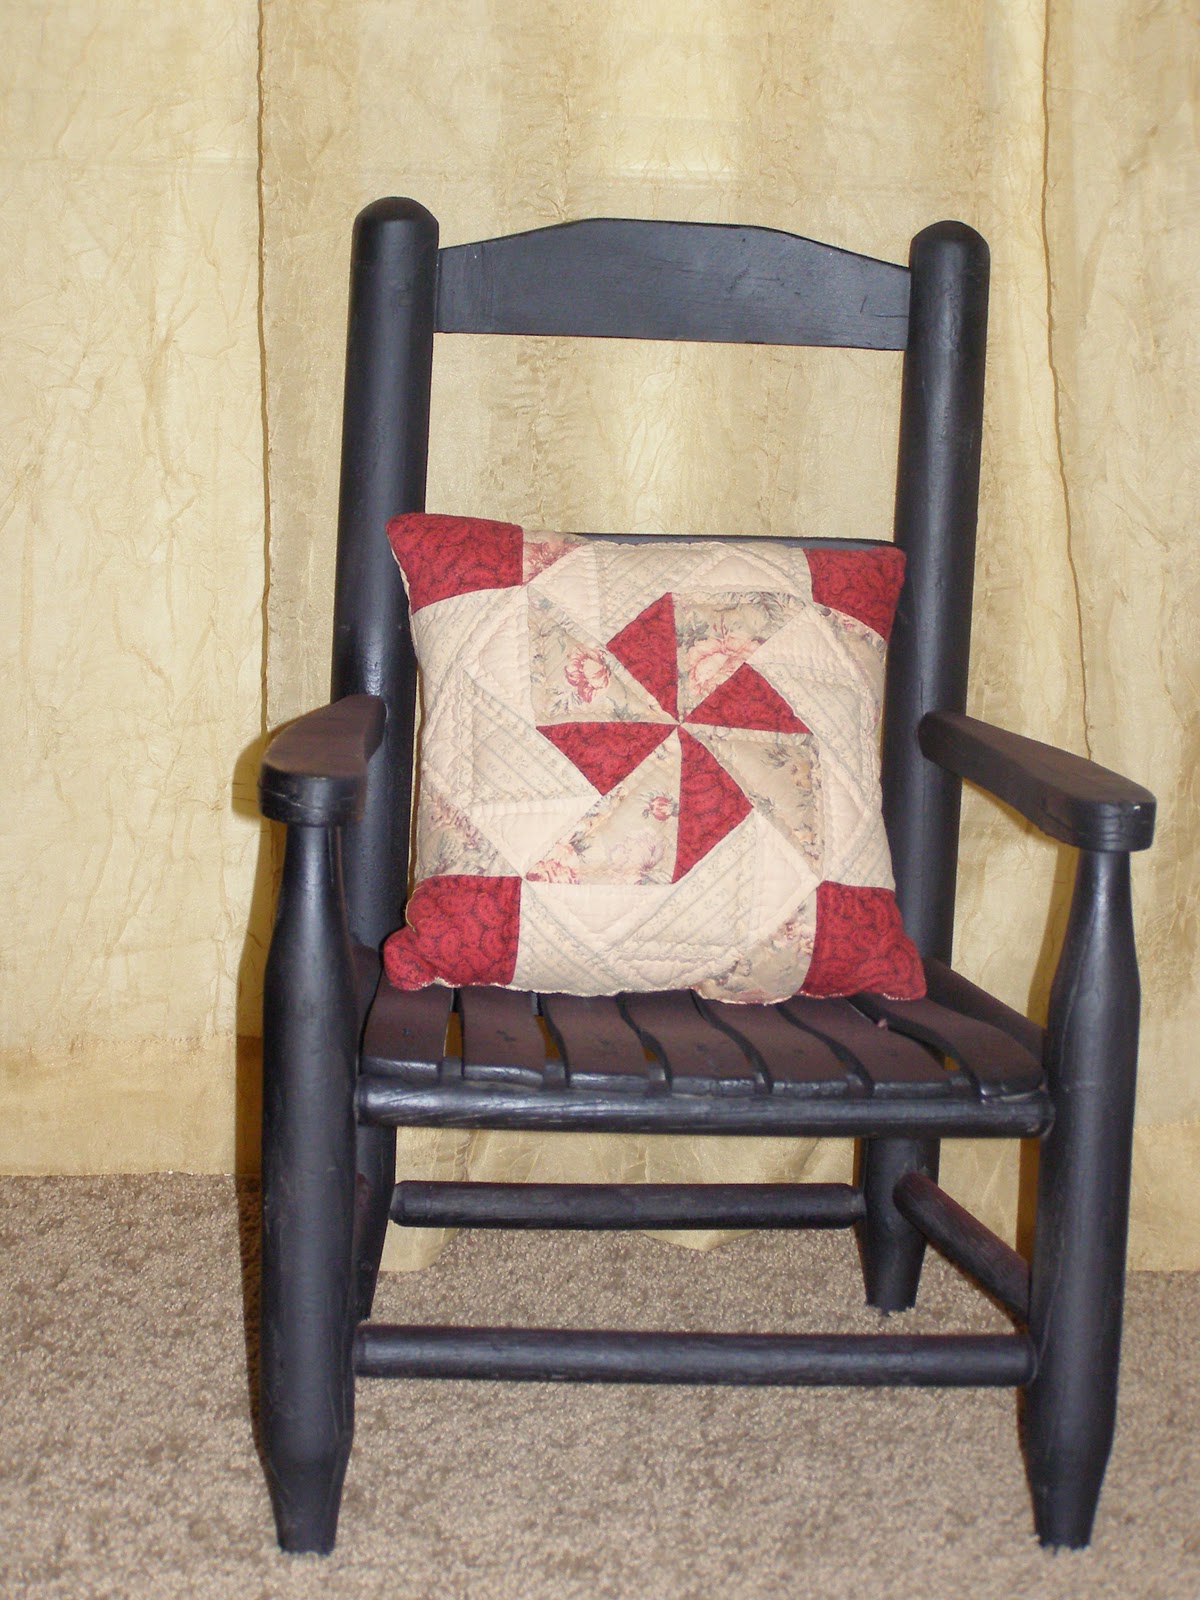
 And since that little black children's chair is showing in the background, I will include a larger picture. This is a re-do of a children's chair I picked up at a consignment shop many years ago. It was spray painted with a very light coat of white. The color was fine when I got it, but I recently decided to wood glue it in a few loose places and give it a new coat of paint.

Ahhhh. Much better. 
Happy Saturday. :)

Friday, March 4, 2011

Some thrifty finds.........

I haven't been hanging out at the thrift stores too much lately.
I know......weird.

Explanation....

There is a chance that we might be moving and the mister has been saying words like "downsizing",  "thinning out", "getting rid of" and "reducing" in regard to our household belongings.

I suppose he thinks because his children are moving out, one by one,
 we don't need so much of everything.

So, in an effort to be a good, and supportive wife,
 I have been controlling the urge to stop at every Goodwill and/or thrift store that I drive by.

However,I did make a quick little stop the other day. I was bored and had a little time to kill. (excuses, excuses)
I didn't find much, but I did find some fun things!!!

I picked up this little bag full of star shower curtain hangers. 
 I needed some for our guest bathroom.
I had some hideous plastic rings on the shower curtain and I knew these little babies were the answer!

AND, they were only $2.99!


 Some black spray paint and, TAH DAH!!!
See!?  Sooooo much better.


And someone, who shall remain nameless, (but has the initials C.C.), didn't even notice.


Same day.....I found these patterns.
I almost missed them.
Had I not bent down to look at something else, I would have missed them entirely.

99 cents a piece.
Can you believe that!?
The best thing about these patterns
is that some of them came with the fabric, thread and other necessities!
Seriously...when I find stuff like this, I get a little giddy.  


See how easy it is to finish up a project when someone else does all the preliminary work! :)

These will be so cute in a little bowl for Easter.


Moral of the story-
Find thrifty treasures that are small so that they can be brought into the house virtually undetected.


Tuesday, November 23, 2010

Stick a fork in it.

Because it's done! :):)

I haven't had a project in quite a while that I was so anxious to finish.  
I had this old denim quilt that was getting a little worn out. The back was thin and ripping and the top was coming apart on many of the seams. I thought I would just throw it away, but then decided against it.

I took it all apart and decided I would re-do it. I saw a "sew as you go" quilt idea at a quilt store on a recent shop hop and thought it might be fun to use the top to try out the idea.

It was one of those projects that sounds good in the preliminary stages.....

 I traced a dinner plate 35 times on the quilt top.
(*note to self....permanent marker does not wash off dinner plates.)
Then I traced 35 circles onto flannel.
Made sandwiches.......
Put them all together in rows.......


This is what I ended up with.
There was a lot a little cussing during this project.

I traced a square inside the circle. (I did measure and do some planning before this part)
Then I pressed along the traced lines and sewed along the crease with the wrong sides together.
Then I folded the wrong sides down and sewed them to make the flannel bits look like they were pieced. Then, I snipped the edges to make it a rag quilt.

There were so many seams to sew through and it got very heavy. There was also a lot of pressing and that was difficult to press the denim effectively with the heaviness off it.

Consequently it was hard to get the seams even.

But it'll keep somebody warm.
Obviously Rusty thinks it's comfy.

I think I might try this again....on a smaller scale.....and with NO denim.
Maybe a table runner or something.
Simply to I can see if I can do it without the cussing. ;)