Showing posts with label thrifting. Show all posts

Wednesday, October 26, 2011

Halloween fun.

I love Halloween, but since moving to Arizona, I have a hard time dragging out all of my things.
It's because the temperature is still pushing 100* and it feels like summer, not fall.

But, they're finally out and I got a little excited. ;)
I remembered that I sold a lot of my decorations at a yard sale this past spring so a bit of crafting was in order to fill in some empty spaces.

This is a little thrifted frame that I covered in wiggly eyes. So cute and FAST to make!
 And, yes.....I saw a version of this on Pinterest.
Don't judge me.
 The picture of the owls is from some scrapbook paper that my precious son, Mark gave me.
He works in a plant that manufactures scrapbook paper.....
he gets $50 worth of free stuff a year! Hello freebies!
.
 This is another quick decoration idea.
Another thrifted frame, spray painted and distressed, with a jack 'o lantern sticker on the glass. I put a piece of scrapbook paper behind it.  

This is not a decoration but a new addition to our family.....

 Meet Cody.
(Named by Ragan)
He is a tarantula that lives outside our front door.
He's a big'un.

We were wondering what kind of a critter was making holes and burrowing in the dirt.

Now we know.

He can stay as long as he takes care of all the other bugs that lurk around the front door. 
But he can't come inside.
Ever.

Tuesday, October 18, 2011

cake plate love....

Lately, I have been loitering on the Pinterest sight far longer than necessary.
I'm sure some might say it's unnatural and unhealthy for someone to sit and covet  admire all the pretty things on there, but I think I will take my chances with it all!
Well.......on Pinterest, I learned a valuable skill. And that skill is.....cake plate making! Yay me! :)
All you need to make your own cake plate is;
1. some sort of pedestal.
2. a plate
3. Spray paint, if desired.
4. some special glue


So, off to the thrift store I went, in search of a plate and a pedestal.

I found this candle holder for the pedestal......
And this plate........
I loved the green and black so I knew I wasn't going to paint the plate, but the candle holder definitely needed paint. Flat black to be exact.......
With a pencil, I traced around the candle holder on the bottom of the plate.
 I eyeballed the center, but a more perfectionist type might want to measure.
I  put a thin bead of silicone adhesive around my pencil mark.
Less is more when it comes to this kind of glue.....learn from my error here, folks. :)

I let it dry for a few hours and then flipped it right side up.
Easy, Peasy.
For now, this cake plate will hold Mr. Jack.
On account of I won't be baking any cakes in the near future.....on account of my unattractive mid-section girth.......on account of my emotional eating.
But a girl never knows when a cake may be needed....like for a decoration or something.
(or an emotional break down! haha!)

With the silicone adhesive, it is safe to hand wash these babies.
If you opt to spray paint the plate, put a paper doilie or other barrier between the cake and plate.

Have fun!

Wednesday, October 12, 2011

I've been junking again!

I am not a Craigslist fanatic, but I do get on to check things out from time to time. I always check the free stuff first and then I go to the furniture section, and then finally to the antique section. I have rarely called on or purchased anything because it has to be something specific that I am looking for, and priced within a limit that I've set for myself. With those parameters, the pickin's are slim.

I happened upon a free listing one morning that I just had to be the first to get!
One of the items up for grabs was this cute little deacons bench.
Truth be told, I didn't even notice the bench in the picture on the add. It was all the other stuff that I was interested in. (I will show that later!) It wasn't until we got to the house to pick it all up that I spotted it!
Although it appeared to have been sitting outside for the last several years, it was solid.
It was also super dirty.
 So I cleaned it up and went to work.
I sanded it lightly and spray painted it a lovely buttery yellow.
Then I sanded it again to distress it, and wiped Old English scratch cover all over it. (I opted for the Old English because it doesn't have an offensive smell like stain does and I didn't want to wait to bring it in the house.)


 I put it in the hallway that leads to the preschool room, next to the guest bathroom.
(Picture taken from laundry room doorway)
Then I made this little pinwheel wall quilt to hang over it.  
Oh. I love things like this. Especially with the very affordable and agreeable price of free. ;)

Wednesday, June 1, 2011

A new lamp....for under $10!

I spotted this cool looking lamp at the GW store a few months ago.
I was dying to get at the make over, but we have been so busy wrapping up
 the end of the school year that I just barely was able to do it.

Now be patient with me as I explain what I did......
I seem to have lost all the pics that went along with the explanation.

I unscrewed the top where the bulb goes. It just unscrews. No tools needed. Once that was done, everything just kind of slides apart....but I left it all connected since I knew I probably couldn't re-connect all the wires if I wanted it in all separate pieces. (make sense??)

I masked off the plug, bulb holder and cord.

Then I painted it with spray paint. It is a Krylon color called Watermelon.

I got a little bit of over spray on the glass, but it came right off with a little W-D 40.
(Sprayed it on a rag then wiped the paint off.)

After it was dry, I slid it all back together and screwed the top back on.

Easy, Peasy, Lemon Squeezy.

 I bought a new shade with a 40% off coupon.

While the cellophane covering was still on the shade,
I traced around the inside of the small part where the fabric is now.

I carefully took the cellophane off the shade and taped it down on a piece of paper to give it more stability. Then I cut it out. I pinned it on some fabric, and cut 4 pieces.

Then, I used clear craft glue to adhere it to the shade.
Using a tooth pick, I smoothed the edges down,
 making sure to clip any threads that may have come loose.

Finally, I glued some fancy ric-rac around the top and bottom.

I love how it turned out.
It's going in our guest room.
The guest room that we will put together after we're done painting our whole downstairs....
which is taking far longer than I want it to.
Right now, it just looks like we turned our house upside down and shook it real good.
Clutter and mess.
The very two things that make me really cranky.
Oh. And it's getting hot.
Make that the THREE things that make me really cranky! ;)

Wednesday, April 13, 2011

Ugh. Cuss word! (Chair make over #2)

This was one of THOSE projects.
The kind that makes a person procrastinate projects of this sort in the future.
I had an idea in my head about how I thought this chair would look when I was done with it.

It's a little wire chair that I got from a friend many, many years ago.
Makenzie has had it in her room and it's been fun keeping it the way it was.
 Every time she changed the look of her room, we would buy a new toilet seat cover to put on the seat. They always fit perfectly and there are so many choices! :)


Well.....I had an old round pillow that I cut open so I could use the stuffing on the seat. I carefully covered it with batting and stapled the batting down.

 Then I added the fabric and stapled it down.
And, if you're wondering,
YES, my hand was really cramping trying to use that big clunky staple gun.

I trimmed it up really nice and neat underneath.

 Do you see my markings on the bottom? I was being so careful to make sure that the seat fit perfectly back on the chair once it was  completed.

I wanted to make it have a tufted look so I decided to add a covered button to the middle of the seat. I attached it using wire. I brought the wire up through a hole in the bottom of the seat, looped the button on and put it back down through the hole.
 I pulled it tight with pliers and stapled the wire down in place.
 While I was covering the seat, the chair,
that I had spray painted a glossy black, was drying out in the garage.
I was so excited to bring it in and attach the seat!
 And that was when I cussed.

 It wasn't a "bad" swear, it was just a little one.

I cussed because I noticed that the stripes weren't centered on the seat.

And, the button wasn't centered either.

Not to mention that it made the seat look like it had a giant belly button.

Ugh!!!

So, I gave myself a 24 hour cooling off period.......
and started over.


Here is the big reveal!

Centered striped and no belly button.
***sigh***
I feel much better.
No more cussing for me.

At least for now. ;}

Saturday, April 9, 2011

a vintage finish.

About 5 years ago, I bought a vintage quilt top on eBay. It was an incomplete top so it was very inexpensive. When I got it, I didn't quite know what to do with it, but what I did know was that I loved the colors. I was made from old feed sacks, which delighted me all the more.

I could see where the seams of the sacks had been picked apart
and there were stamps like this on a few of the blocks.
I loved the "make do" quality of it.....
See here where two of the light blue hexies are the same color but not the same pattern?
 I like to think of the thrifty hands that pieced this together using the last bits of fabric they had. :)

Since I couldn't make any sort of a quilt out of the top I decided to take it apart and make a few things with it. First, I unpicked enough blocks to make a portion of the quilt into a table runner.

Then, I took two of the unpicked blocks and framed them. I found these frames at goodwill and spray painted them black. Then I used spray adhesive to attach them to the fabric backing.

I took the largest piece for the runner and machine quilted it.
I used a stippling stitch with a red variegated thread.
When that was finished, I couldn't decide how I would bind the edges.
I finally decided to measure and cut straight edges, because some of the border hexies were so uneven.
 Then I bound it with a black pin dot fabric.
It was a ginormous pain in the neck to sew all those corners,
and it took a whole lot longer than I want to talk about,
BUT, I'm so glad it's finished!
 I like how it is just the right size for our big table.
And I loooove the red!
 I hope that whoever pieced this all those years ago, likes how it ended up. 
 I am certainly grateful for all the work that went into it before it came into my life!

Monday, April 4, 2011


A few weeks ago, I had the rare opportunity to stop in at our local Savers store. I don't go there often because, for the most part, they just have clothes and shoes.

But every once in a while I find a treasure there.

This was one of those occasions!  


In a bag, hanging on the wall, I found 12 sock forms.
 Now, they aren't anything vintage, and they were painted in some funky colors,
 but I could see these would be pretty easy to make over. :)

Here is the before picture.
I'm not sure why there are so many holes in the smaller ones.
 My guess would have to be for some decorative purpose....?

**Thanks to my blog friends, I have been enlightened about the holes in the sock forms...They are ventilation holes for the drying of socks. I let out a great big DUH! when I read their comments.
Leave it to me to completely miss the obvious! ;) 

 So, I got out some of my trusty spray paint colors and started spraying.


I found a place for one in our guest bathroom.......


A couple more in our family room.........
I got this wall hanging from Kimberly at My Brown Bag Studio.
We did a swap a while back. I loooove it!
And don't mind the dust....I live in the desert, and dust is just a given.

And more in the upstairs hallway.
Boy!  I sure do appreciate an easy make over project!
**************************************************************************
Onto some other stuff......

I have a dear friend, whom I have known for years, that is organizing a service project for some of the children of Africa. Her son is serving a mission on the Ivory Coast. Given the fact that our son, Mark recently returned from serving a mission in Uganda, it was easy for me to want to contribute.

  It goes without saying that there is such need in Africa....it's hard to even put a finger on one thing that is needed. But, Sindy heard about the teachers who were trying to teach the little children some church songs, but didn't know the tunes. They hadn't heard the songs before, and without a piano, they had no way of knowing the tunes. Sindy immediately went to work organizing a project, collecting children's hymn books and CD's containing the primary songs (in French) to send to Africa.

Then, as most projects go, it got bigger. More people wanted to participate so Sindy decided that she wanted to put together 100 tote bags that included a picture of Jesus, a CTR ring (a popular piece of jewelery in our church that has the CTR emblem on it, reminding the wearer to "Choose The Right") and a Book of Mormon in the French language.

Since I have a hoard of an over abundance of fabric,
 I decided to sew up some tote bags to contribute to the cause.
  I know I'm not alone in saying that there isn't a better feeling
 than knowing you have done something to help someone else.

It sorta just makes you look for the next time you can serve, right?!


:)  :)  :)  :)


One of my favorite sayings......


Give without Remembering,
Receive without Forgetting. 


Have a blessed day!


Friday, April 1, 2011

some more make overs


Well, it's April 1st, and I hope everyone is playing nice April fools jokes on people.
The mean ones are just not as fun!
My Craig sure was the victim of a mean one this morning.....

One of his athletes came up to him this morning with big tears in her eyes,
asking him to help her tell her parents that she was pregnant.

As he went to give her a consoling hug, telling her that he would do what he could to help her,
she started laughing and said, April Fools!

Needless to say, he didn't think it was funny.

I have always told my kids that playing a joke on someone is only funny if everyone has fun.


Anyway.......I have a couple of new make overs to share.

This bowl was a thrift store find that I got a while ago. I really liked it's size and shape.


 It was only $1.99 and I knew I could sand the edges to get rid of the few blemishes it had.

 After I spray painted it black, I did just that. With a nice coat of stain, it turned out real purdy!
 I put some paper grass in it and it made a nice little nesting place for my new grunged eggs.
Linda is such a sweet blog friend and has the funnest blog.
These eggs are so easy and fun to make and they smell delish!
If you've ever grunged up some candles, then these will be a piece of cake for you.

I keep my wax in an old coffee can and heat it double boiler style.

I put a pan of water on to boil, and set the can inside of the pan.

I use plain old wax that you can buy at the grocery store and colored it with black and brown crayons. I have also put bits of old candles in it (I melt what's left in the jar in the oven (checking often) on about 150* until they're liquid, then pour it in the coffee can) and they help with the yummy smell.

As for the smell, I have added all kinds of spices....cinnamon, nutmeg, cloves, allspice, etc.

After all of it is melted, I take the wax off the heat, and start dipping.

I stir the wax  often (with an old wooden spoon) to ensure the spices haven't all sunk to the bottom.
I use rubber gloves and just dip the eggs with my hands
and then set it on wax paper until they have cooled.

 I also rolled them in more spices that I have in a bowl.

It took about 4 dips and rolls before I got the consistency I liked.
As the wax cools, it sticks a little better.
I used my hands to help mold the wax around the egg.
 After I'm done, I peel the drips off of the wax paper and put them back into the wax along with any left over spices. SO fun! :)


The next little make over is for Ragan's bathroom.
I have been looking for a little clock to put in there for a long time,
but couldn't find the right one for just the right price.
BUT----she NEEDS one in there, on account of her chronic lateness.

I remembered this clock that my mom gave me about 100 years ago that I had out in the garage.

I figured I'd see what I could do with it.
I took it all apart......glued some round beads to the bottom for legs and painted it.


And here it is.
I painted it a hot pink first. Then I painted black over the pink. Her bathroom has bit of a shabby chic look to it, so I didn't want to prim it up too much. I spray painted the gold rim around the clock silver. After everything was dry, I lightly sanded the edges to show a tiny bit of pink, then sealed it with a spray sealer.


I think it turned out perfectly for Ragan's bathroom counter.

I have a feeling she will still be late though.


She never has really embraced my 5 minute beauty regimen.

Tuesday, March 29, 2011

Chair make over #1....and some other stuff!


It's no secret that I have a "thing" for chairs. Every time I stop at a thrift store or yard sale, chairs are always one of things I'm on the lookout for. I like to have a lot of chairs and fill them with family and friends. I love the idea of sitting down at the table for a meal and having to scoot out to add a chair or two! 
Another thing  I love about chairs are their differences....There are just SO many kinds of chairs.


When I was younger, my family lived in England.

 I believe my obsession with  appreciation of all things old began there.

My parents acquired some antiques while we were there.
It seems that over the years, a lot of them have been passed on to me.
I have happily received them. (Craig-not so happy! ha ha!)


Here is the first make over in a series of several chair make overs.

This simple little chair is one that we brought back with us from England.
 There were two of them originally, but I used one outside in our garden many years ago
and it had to be thrown out because of weather related issues.
I am sad about that now, but anyway....

At first, I  weaved old ties together to form a "seat" and stapled them to the underneath side. It looked super cool, but after a few behinds sat on them, they began to sag.
So, I started over with a new approach.
The whole thing got a coat of black spray paint.
After that, I sanded the edges and rubbed it with a nice gel stain.

While that was drying, I attached a few layers of batting to the piece of wood that my most dear and helpful husband cut for me to use as a seat. (I used spray adhesive to do this)

The chair is kind of a smallish one so I didn't want the seat to be too padded.
Then, I used a $3 remnant of upholstery fabric to cover the batting.
I used the spray adhesive here too, but also used some staples to secure the fabric underneath.

And, here is the big reveal....
 

I will add a little throw pillow and some other things with color as soon as
I get enough gumption to drag all of my spring/Easter decorations out!


Another thing that I have been working on is re-framing this sampler.
I got it at a thrift store about 10 years ago. I didn't have that many choices as far as framing it back then. To have it professionally framed would have cost me a lot and the sampler is just an odd enough size that it was impossible to find anything already made.
 So, here is how it looked before.

 I enlisted my husbands expertise in making a frame for it that would be the right size,
but one that would still let me use the glass from the old frame.


He routered the wood a little deeper on the insides of the frame so the glass would fit....
 Sides of the frame


And top and bottom of the frame (I have no idea what that fuzzy bit of stuff is there...gross!)

 This frame also got a coat of black spray paint and gel stain.
I like it much better now.
I just love making over things that someone else has given away!

Saturday, March 5, 2011

A first try

After making the wool eggs that I showed you in my last post, I decided that I would make a penny mat.
I have worked with wool in the past and have found it very fun and easy,
but never have made a penny mat.

 I have only admired everyone else's!

I actually bought a little kit for this one so I would have a pattern and the instructions for future reference.

And here it is.....
(I put in on this big wooden charger so it could be seen on my black table)

To be honest, I struggled just a little bit.
It's not that it was difficult.

I think it's because I tried too hard.

Or maybe it's because I don't follow instructions well, or possibly,
 because I feel compelled to do my own thing.....

I don't know, but there is probably some medication that helps people with problems such as this.

The instructions had me trace the pattern onto freezer paper (brilliant!). The circle pattern had a large circle with a smaller circle inside it.

The smaller circle was to be cut out from the larger circle......so I had 16 "donuts" and 16 "donut holes".

Make sense??

Then, they were arranged as seen above.  The problem I found was that the little circles weren't necessarily the same size as the holes. The wool did stretch as I blanket stitched it into place but they smaller circles appear to be "sunk into" the larger ones.

Is this the way it's supposed to be?
I always assumed that the smaller circles were on top of the large circles.
Mine seems to lack the dimensional look that I have seen before.

Anyway, it is what it is.
I still like it.
And, I will more than likely try making another one.

That is, after all of you professional penny mat makers, impart your wisdom and knowledge unto me.

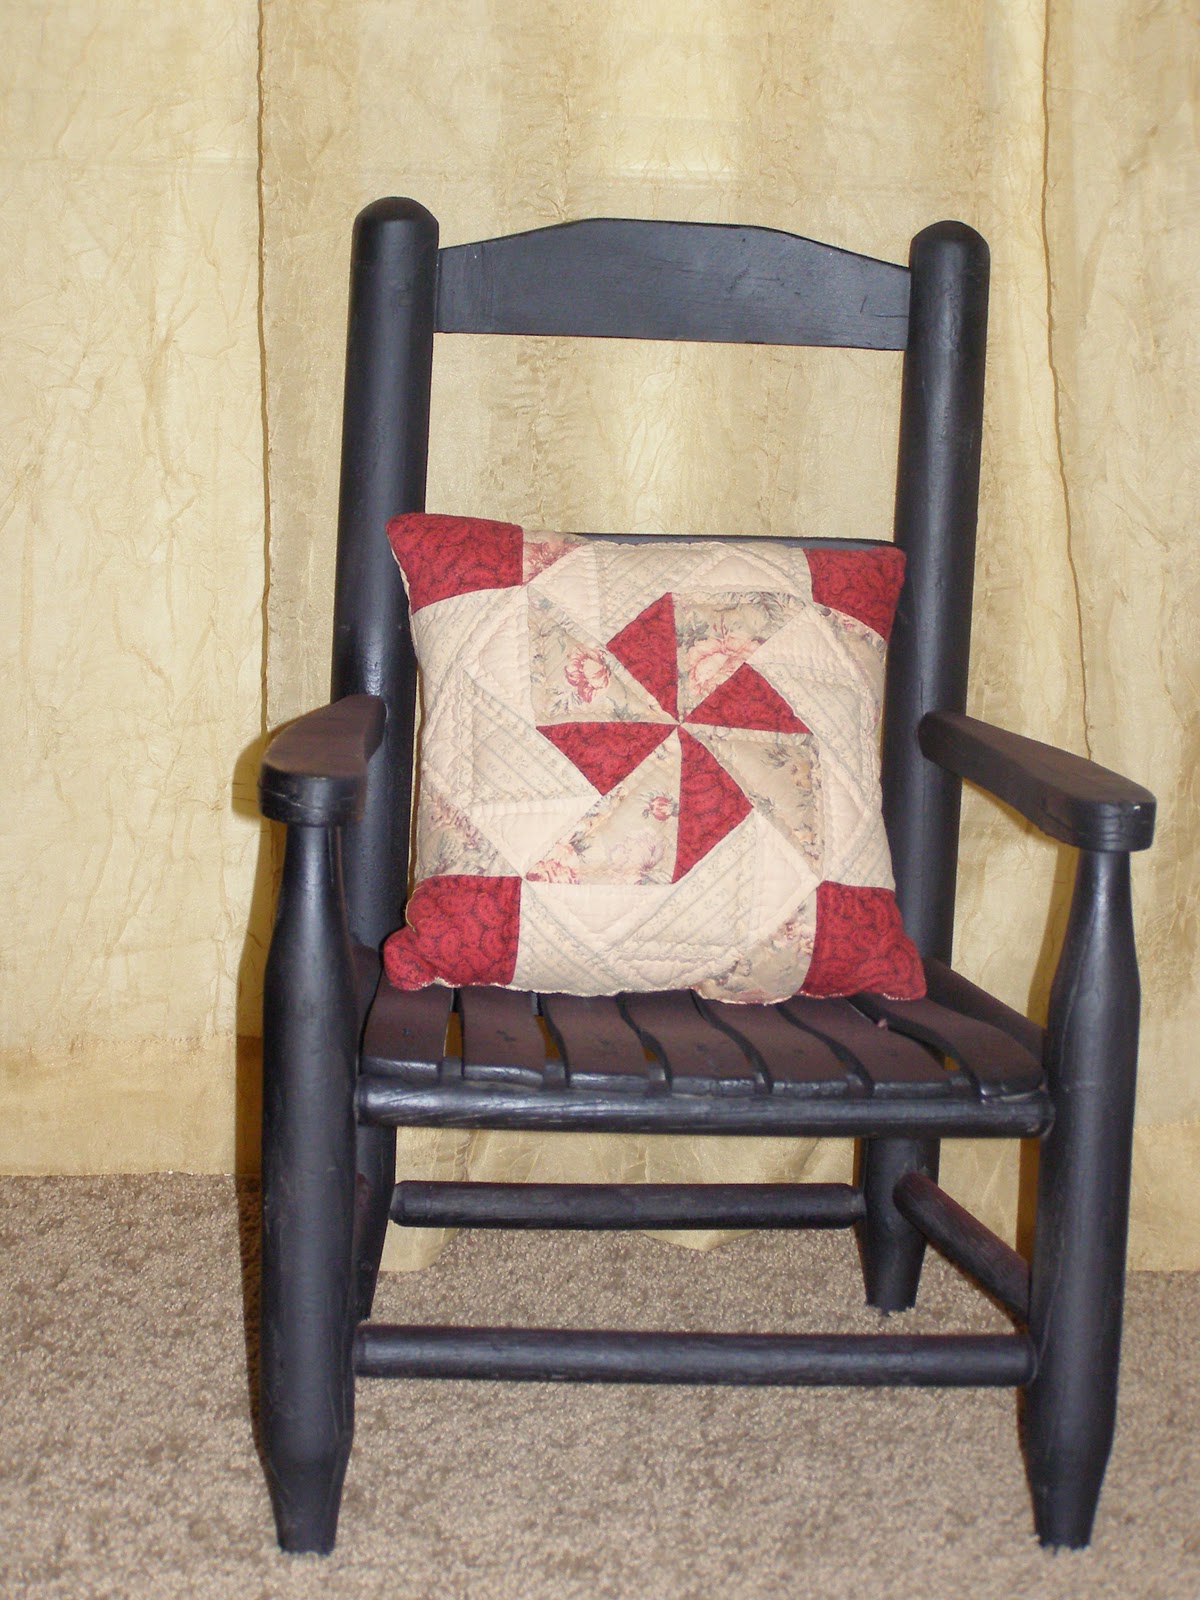
 And since that little black children's chair is showing in the background, I will include a larger picture. This is a re-do of a children's chair I picked up at a consignment shop many years ago. It was spray painted with a very light coat of white. The color was fine when I got it, but I recently decided to wood glue it in a few loose places and give it a new coat of paint.

Ahhhh. Much better. 
Happy Saturday. :)