 Next, cut two 8" squares from the fabric and one 8" square from a piece of batting. I use the Warm and Natural batting for these but any low loft batting will do.
 Make a little sandwich with the fabric squares right sides together and the batting on the bottom.
Cut a matching piece of ribbon approx. 4" long. Pin the ribbon in a loop between the two layers of fabric.
 Pin the ribbon in a loop between the two layers of fabric.
 Sew with 1/4" seams all the way around, leaving a 2" opening for turning.
 Turn square right side out. Your batting should now be on the inside and your ribbon loop should be on the outside. Pin 2" opening shut and top stitch all the way around.
 Are you still with me? Are you confused?
Place your ruler on the inside of your square matching the side corners. (the loop corner being the top) Mark a line from corner to corner. This will be your sewing line as you sew the towel on.
 Press your dishtowel in half.
 Along the pressed crease, sew a basting stitch. You can also use a gathering stitch if your machine has one. You can also do this by hand if you want.
 Press your dishtowel in half.
 Along the pressed crease, sew a basting stitch. You can also use a gathering stitch if your machine has one. You can also do this by hand if you want.
Gently pull the loose ends to gather your dish towel in the middle.
 Lay your fabric square on top (with marked line up) matching the corners to each side of the gathered towel.
 Taking care to make sure the towel is laying straight, sew across your marked line. (don't forget to change your stitch length back to the normal setting)
 And, WAH-LAH! There you have it. Easy peasy, lemon squeazy!
These make great neighbor gifts for Christmas. Add a little tag that says, "May the Christmas Spirit 'hang around' all year long!"
 **Yes, that is some sort of splatter on my oven door. Funny how I didn't see it until I took the picture!
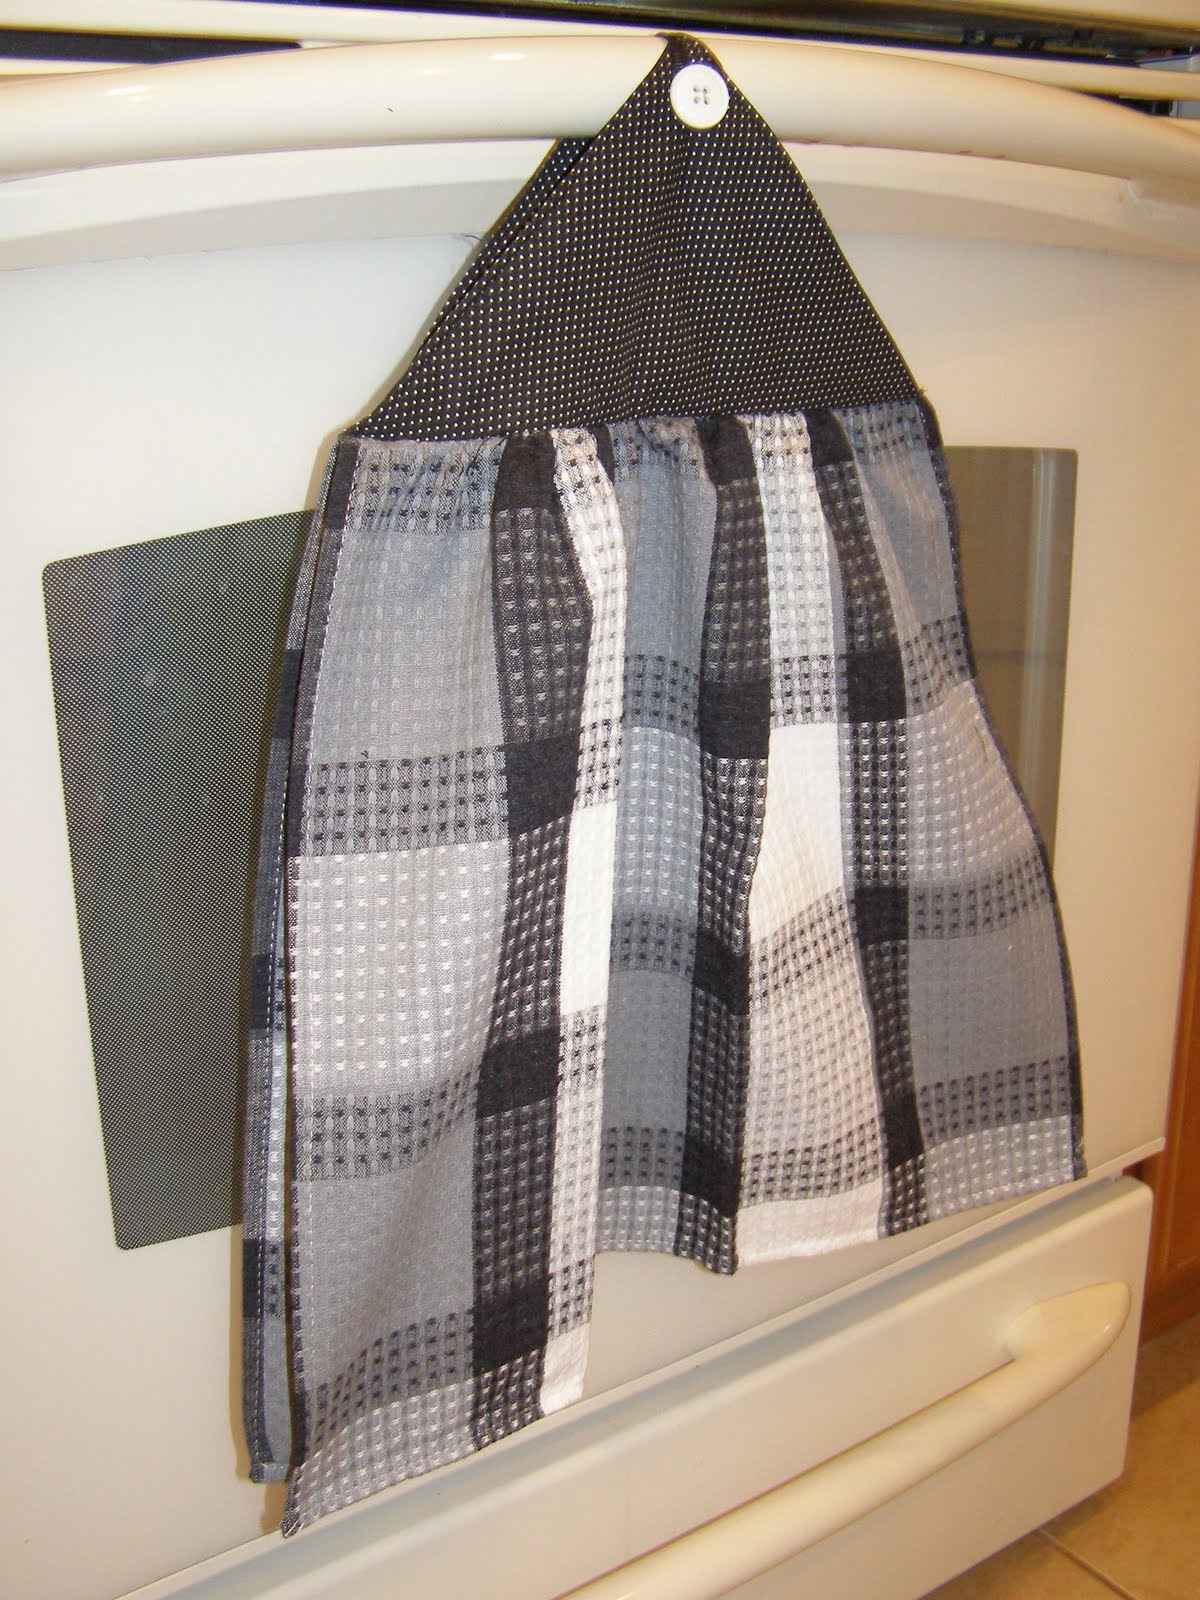 **Yes, that is some sort of splatter on my oven door. Funny how I didn't see it until I took the picture!
Happy Sewing!!


9 comments:
How cute is that?? I thought the tutorial was very clear!!
Wishing you and yours a blessed and Happy Thanksgiving! warm hugs, Linda
How cute are these!
I see visions of Christmas ones in my head!
So corny...sorry I couldn't help myself.
But really, this is a great Christmas neighbor gift huh!
Thanks!
Happy Thanksgiving!
Jo Anne, I like the idea with the fabric rather than a dishtowel or crocheted top. Thanks for the instructions. ~Ann
Fabulous!!!!!
Shew good thing I didn't make one for you cuz it wouldn't have compared. LOL ;-)
Ok I started one thing last night and scrapped it because I had a wonderful idea about 1/2 hour ago. I am sooooooo excited!!!!!!!!
teehee
Mary
Cool! Now if I could just take the time to do it now that I have the instructions....
Love it!! And the tutorial was great. I will have to make some of these. Great idea. Hope you have a great Thanksgiving. Shall we trade a wall-hanging or something by the middle of December? Let me know what you think. Have a great day. Julie
I like the fabric too, it turned out great and they would make neat gifts!
Happy Thanksgiving!
Rondell
i was stumped for a neighbor gift this year. not any longer! time to get off the computer and hit the fabric store - thanks for the fun idea!
hi everybody
just signed up and wanted to say hello while I read through the posts
hopefully this is just what im looking for looks like i have a lot to read.
Post a Comment